Category: Tech Support

  • Record Video with the Windows Snipping Tool

    Record Video with the Windows Snipping Tool

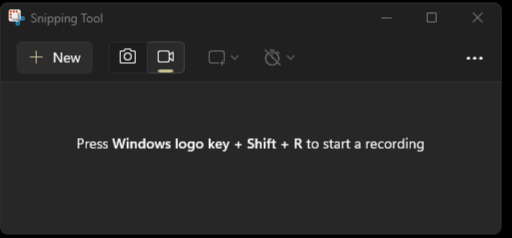
    Hold Windows key and Shift, then press R to open the snipping tool in video mode. You can also open the Snipping Tool from the windows menu or a shortcut to the executable and then click the video button
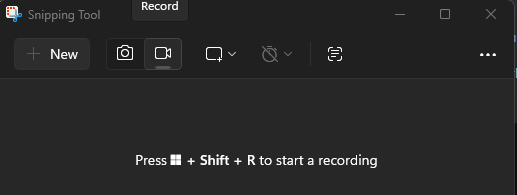
    With the tool open and in video mode you can click “New” or use the displayed keyboard shortcut to begin the screen selection mode.
      Now you can select the area of the screen to record by clicking and holding the left mouse button at the first corner and dragging the mouse with the button still held, to where you want the 2nd corner. This estabilishes the rectangular area to be recorded.

      This toolbar will appear, ussually at the top of your screen.

      Clicking the start button will begin a short few second count down, after which the recording will begin. so be sure your ready before clicking it.

      To the right of that button is the duration in hours:minutes:seconds. This tells you how long you have been recording (once youve started).

      The microphone button (to the right of the duration numbers) lets you select which microphone to record. By default it’s ussually set to “mute” which will prevent it recording any microphone.

      The next button to the right, toggles the recording of audio from your computer. That is any sound your computer nromally plays through the speakers or headphones, like game noises or video audio etc…

      Once the recording has begun, you can click the red stop button to stop and save the recording. At which point you will be presented with a new page:
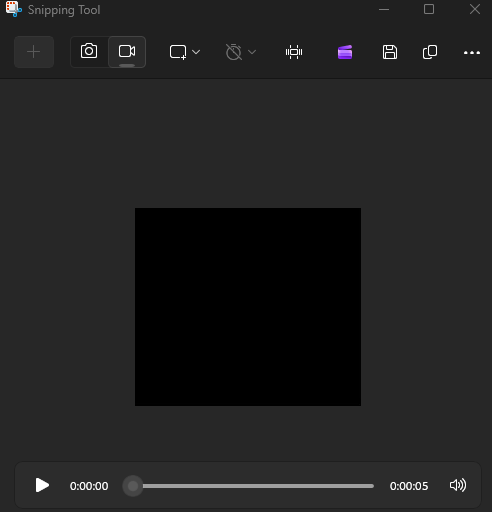
      Here you can play the video back. Use the trim button to cut bits out. Save it. Convert it to a .Gif or open it in clipchamp for more advanced editing.

      Tips:

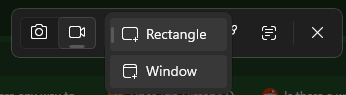
      Before going to screen selection mode, you can click the window select mode button in the follong image to select an entire window, instead of sleecting an arbitrary rectangle.
      Before you publish any video, be sure it does not contain any private information!
      Microsoft’s Snipping Tool recording instructions.

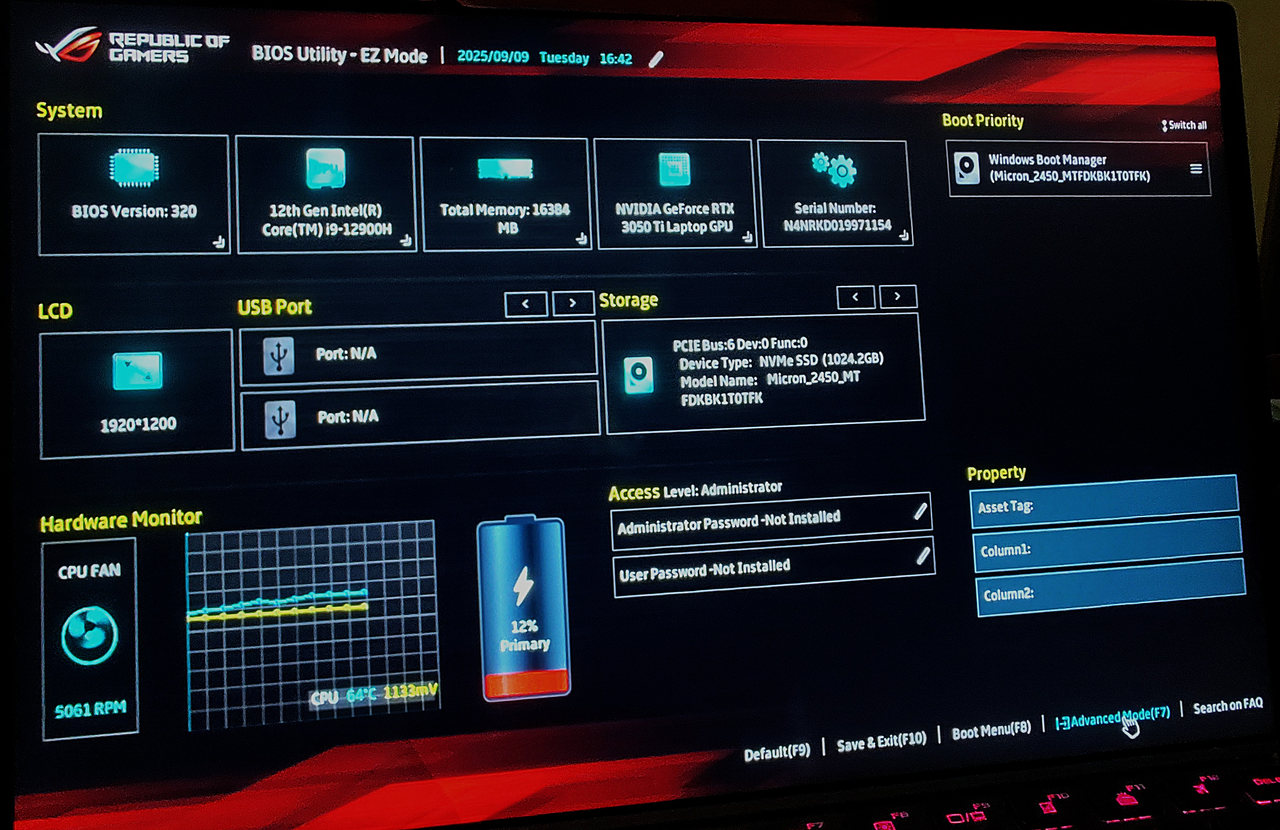
    1. ASUS ROG Flow Z: SSD Missing from Windows Setup

      ASUS ROG Flow Z: SSD Missing from Windows Setup

      If your Intel based ASUS ROG Flow Z does not detect its internal SSD during Windows installation, try the following methods.

      Load the storage driver

      1. Find the support page for your exact ASUS model.
      2. Download the Intel Rapid Storage Technology (IRST/RST) driver, if your model requires it, and extract the files to a USB drive.
      3. At the Windows Setup drive selection screen, select “Load Driver” and browse to the extracted driver files in the USB from the previous step.
      4. Select the matching Intel RST VMD Controller driver and continue. The SSD should appear if the missing driver was the cause.

      Alternative: Disable VMD

      For a clean installation, you may be able to disable VMD instead.

      1. Save and exit, then restart Windows Setup.
      2. Enter UEFI by holding F2 while powering on the device.
      3. Press F7 to open Advanced Mode.
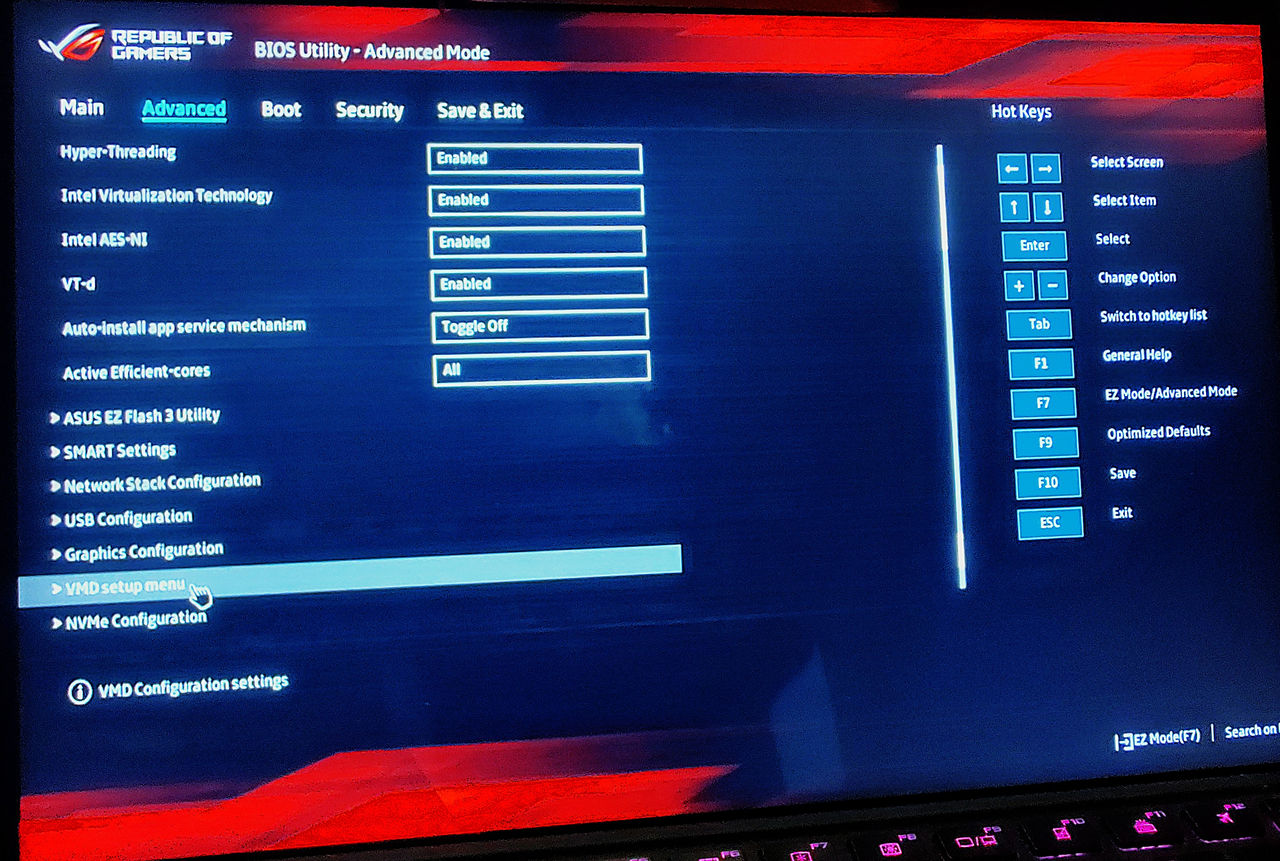
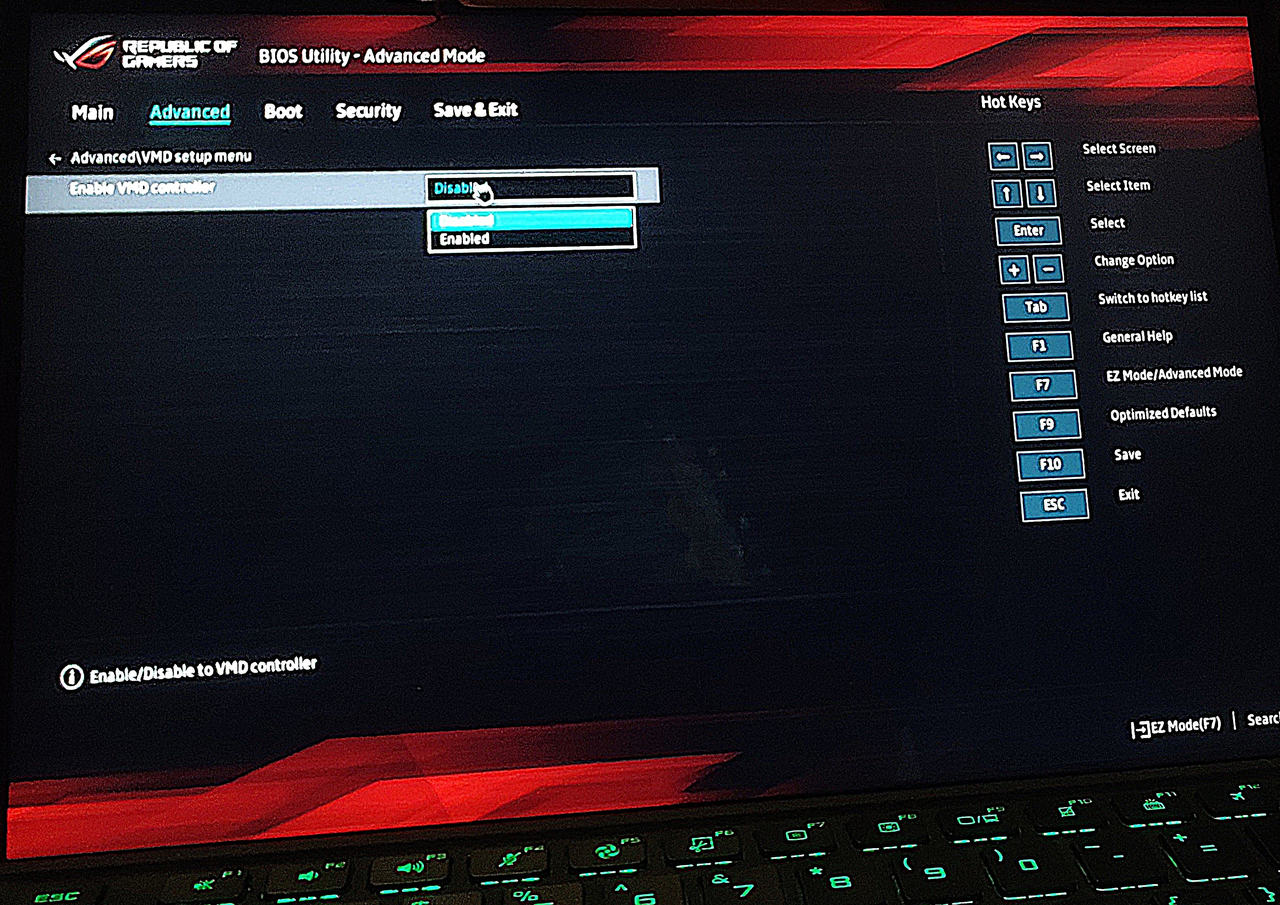
      4. Look for Advanced > VMD Setup Menu and disable the VMD controller.

      ASUS’s missing-drive troubleshooting guide covers both methods.

      ASUS ROG Flow Z Windows Setup storage troubleshooting — screenshot 1
      ASUS ROG Flow Z Windows Setup storage troubleshooting — screenshot 2
      ASUS ROG Flow Z Windows Setup storage troubleshooting — screenshot 3
    2. Android Photos Missing from Google Drive in Your Browser

      First check that you uploaded the photos to Google Drive, and that the Android app and browser use the same Google account.

      Check for a waiting upload

      1. Open Google Drive on your phone and check whether the upload is still pending.
      2. Connect to Wi-Fi and let the upload finish.
      3. If you want to use mobile data instead, open Menu > Settings.
      4. Under Data usage, turn off Transfer files only over Wi-Fi, if that setting is available.
      5. Refresh the same account and folder in your browser after the upload finishes.

      The setting controls file transfers. Mobile transfers use your data allowance. If the file still does not appear, after 10 or so minutes, double check available Drive storage, the upload’s error message, and the selected account.

      Google’s Android upload instructions.

    3. AMP Installing to the wrong drive or directory fix

      AMP Installing to the wrong drive or directory fix

      AMP by Cube Coders is a fantastic game server management tool, automating and simplifying alot of otherwise headache inducing tasks related to managing such servers. However it does have some rough edges. In this case it will install files to the first empty drive it finds or otherwise seemingly a random drive, which is far from ideal, especially if you have USB devices connected.

      Here is the fix for windows 11(should work for any windows version) , working as of 28/04/2022:

      1. Close AMP and Kill any AMP proccesses in task manager
      2. Uninstall via windows
      3. Reinstall
      4. Run through the install wizard as normal and create an instance when prompted
      5. complete the instance wizard until AMP reboots.
      6. Close AMP and kill any proccesses with task manager
      7. Navigate to “InstanceManager.exe” inside the “AMP” folder, within the main install and launch it
      8. select “No”
      9. Right click on the only instance in the list and select “Uninstall Service” and then close the application.
      10. Find AMPDatastore folder and move it where desired
      11. Open REGEDIT and navigate to: Computer\HKEY_LOCAL_MACHINE\SOFTWARE\CubeCoders\AMP\InstanceManager
      12. Edit the “InstanceStore” entry to match the diesired folderpath.
      13. Inside the AMPDatastore folder find and open “instances.json” (i reccomend notepad++)
      14. Look for the line beginning with “”Path”:”.
      15. Change the letter to the correct drive and add AMPDatatstore folders filepath to the beginning
        instead of: “Path”: “J:\AMPDatastore\Instances\AMPInstance1-ADS”,
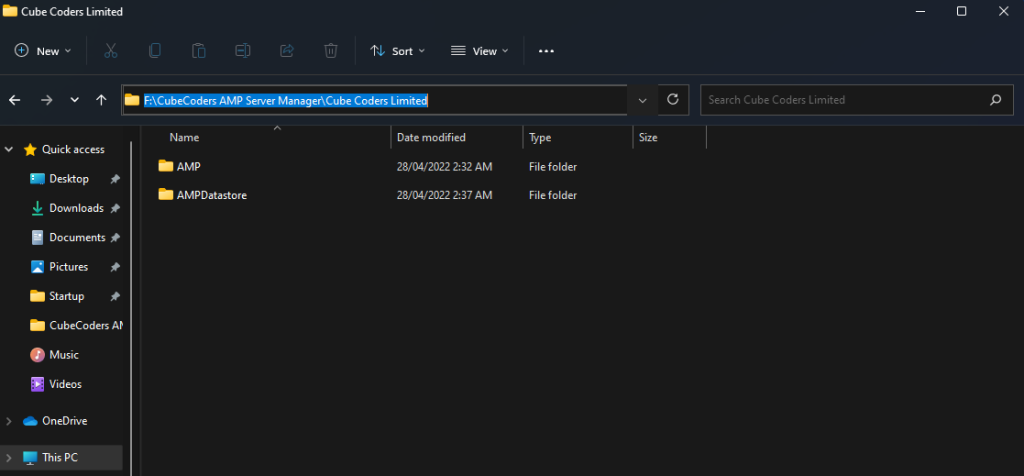
        Make it: “Path”: “F:\CubeCoders AMP Server Manager\Cube Coders Limited\AMPDatastore\Instances\AMPInstance1-ADS”,
        for example
      16. Launch InstanceManager again and confirm everything is where it should be.
      17. from here on you can launch with the main shortcut or exe as normal.
    4. Stupid Invaders Crashing or freezing on button press or click FIX

      Stupid Invaders Crashing or freezing on button press or click FIX

      This fix was successfully applied to the retail disc version of the game, on a windows 10 machine, on the 10/05/2022.

      First try running it in compatiblity mode:

      1. Right click on the shortcut or executable
      2. Select “Troubleshoot Compatibility”
      3. Select “Try recommended settings”. This will probably apply a windows XP service pack compatibility.
      4. Click “Test the program…”
      5. If that fails, close the troubleshooter window and try the next fix.

      The Stupid Invaders 2000/XP Patch

      1. Go here: https://archive.org/details/StupidInvaders2000xpPatch
      2. On the right hand side under download options, click on “WINDOWS EXECUTABLE”
      3. Open and run the downlaoded executable.
      4. Select “PATCH!”
      5. Wait for the confirmation message, then close the patch window
      6. Launch the game

      Hopefully your game is now working fine. These are the steps i used to get it working for a client, but if they don’t work for you heres some other stuff you can try: https://www.pcgamingwiki.com/wiki/Stupid_Invaders