Blog

  • Record Video with the Windows Snipping Tool

    Record Video with the Windows Snipping Tool

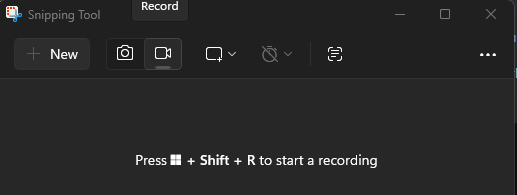
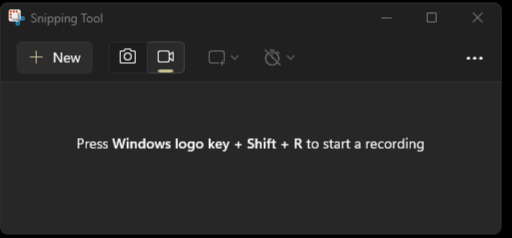
    Hold Windows key and Shift, then press R to open the snipping tool in video mode. You can also open the Snipping Tool from the windows menu or a shortcut to the executable and then click the video button

    With the tool open and in video mode you can click “New” or use the displayed keyboard shortcut to begin the screen selection mode.

      Now you can select the area of the screen to record by clicking and holding the left mouse button at the first corner and dragging the mouse with the button still held, to where you want the 2nd corner. This estabilishes the rectangular area to be recorded.

      This toolbar will appear, ussually at the top of your screen.

      Clicking the start button will begin a short few second count down, after which the recording will begin. so be sure your ready before clicking it.

      To the right of that button is the duration in hours:minutes:seconds. This tells you how long you have been recording (once youve started).

      The microphone button (to the right of the duration numbers) lets you select which microphone to record. By default it’s ussually set to “mute” which will prevent it recording any microphone.

      The next button to the right, toggles the recording of audio from your computer. That is any sound your computer nromally plays through the speakers or headphones, like game noises or video audio etc…

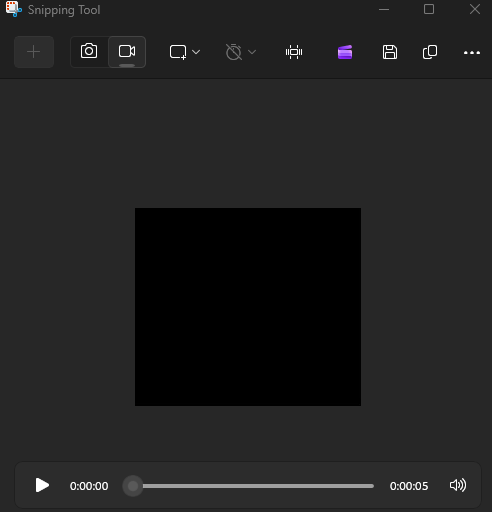
      Once the recording has begun, you can click the red stop button to stop and save the recording. At which point you will be presented with a new page:

      Here you can play the video back. Use the trim button to cut bits out. Save it. Convert it to a .Gif or open it in clipchamp for more advanced editing.

      Tips:

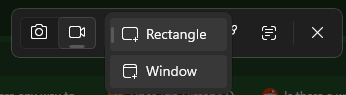
      Before going to screen selection mode, you can click the window select mode button in the follong image to select an entire window, instead of sleecting an arbitrary rectangle.

      Before you publish any video, be sure it does not contain any private information!

      Microsoft’s Snipping Tool recording instructions.

    1. ASUS ROG Flow Z: SSD Missing from Windows Setup

      ASUS ROG Flow Z: SSD Missing from Windows Setup

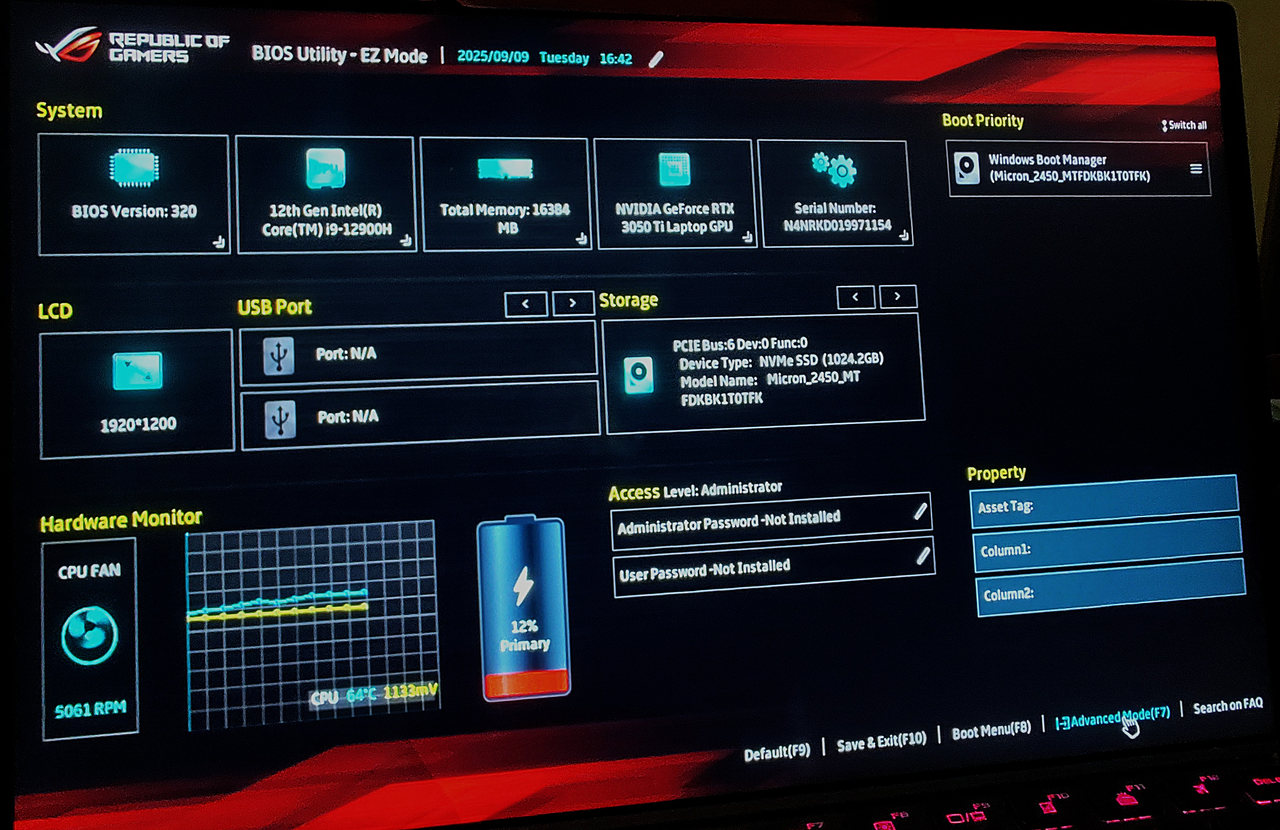
      If your Intel based ASUS ROG Flow Z does not detect its internal SSD during Windows installation, try the following methods.

      Load the storage driver

      1. Find the support page for your exact ASUS model.
      2. Download the Intel Rapid Storage Technology (IRST/RST) driver, if your model requires it, and extract the files to a USB drive.
      3. At the Windows Setup drive selection screen, select “Load Driver” and browse to the extracted driver files in the USB from the previous step.
      4. Select the matching Intel RST VMD Controller driver and continue. The SSD should appear if the missing driver was the cause.

      Alternative: Disable VMD

      For a clean installation, you may be able to disable VMD instead.

      1. Save and exit, then restart Windows Setup.
      2. Enter UEFI by holding F2 while powering on the device.
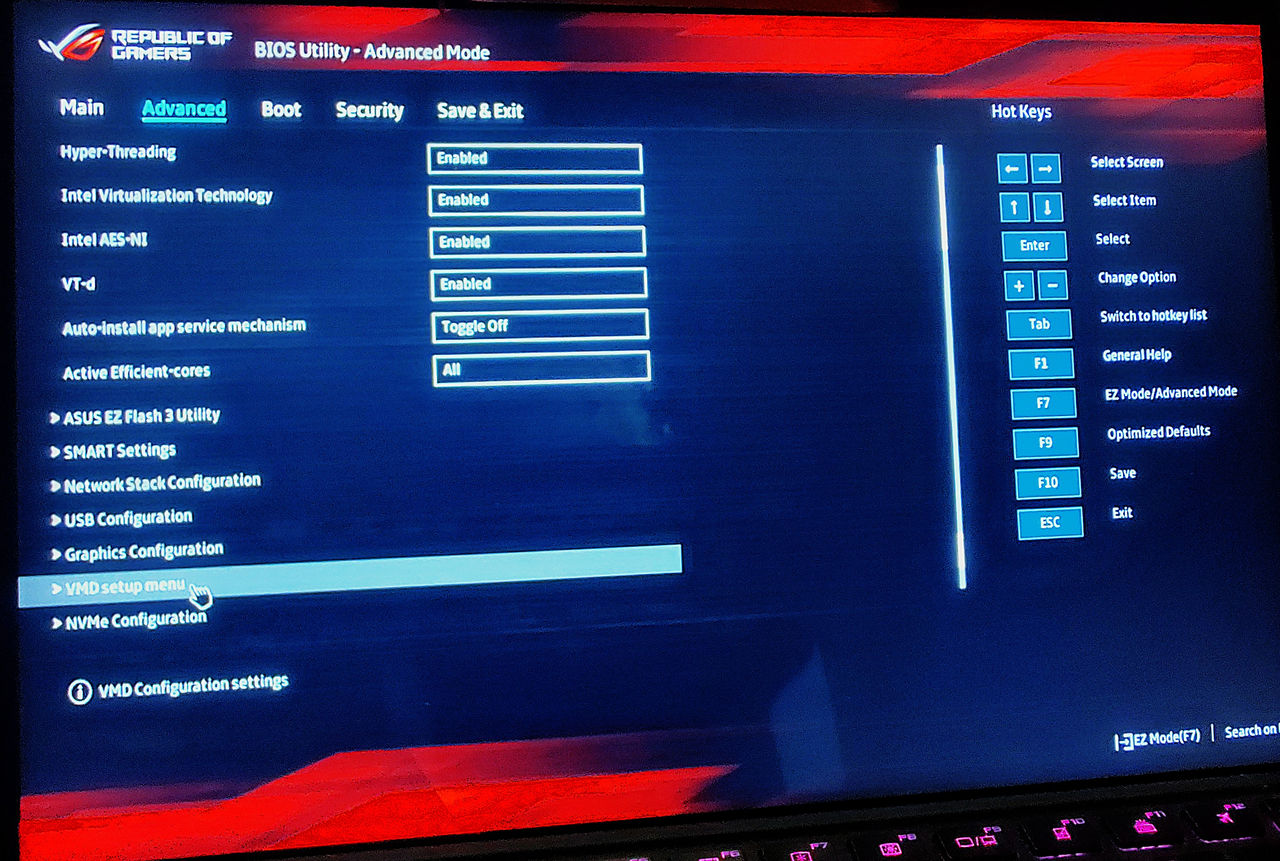
      3. Press F7 to open Advanced Mode.
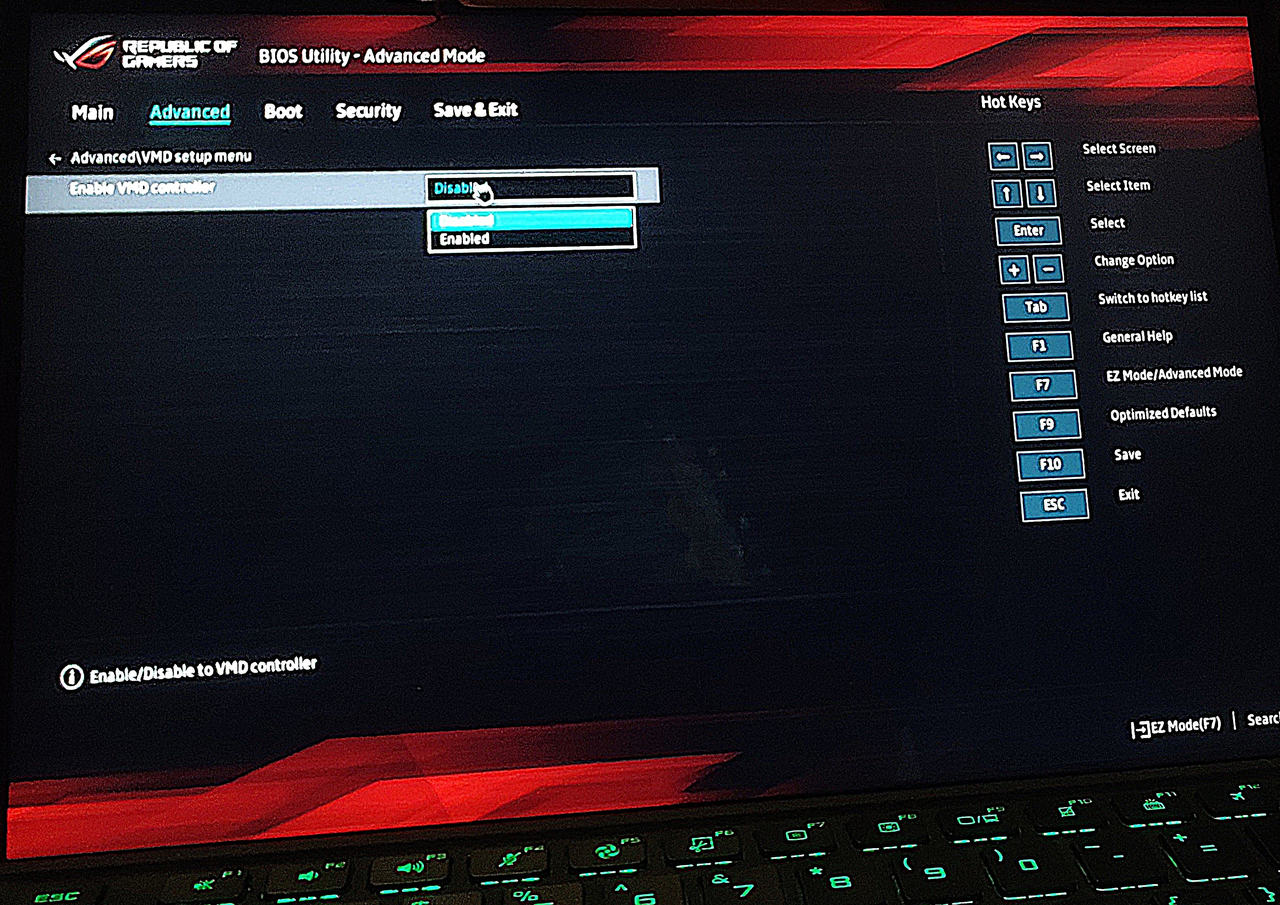
      4. Look for Advanced > VMD Setup Menu and disable the VMD controller.

      ASUS’s missing-drive troubleshooting guide covers both methods.

      ASUS ROG Flow Z Windows Setup storage troubleshooting — screenshot 1
      ASUS ROG Flow Z Windows Setup storage troubleshooting — screenshot 2
      ASUS ROG Flow Z Windows Setup storage troubleshooting — screenshot 3
    2. Android Photos Missing from Google Drive in Your Browser

      First check that you uploaded the photos to Google Drive, and that the Android app and browser use the same Google account.

      Check for a waiting upload

      1. Open Google Drive on your phone and check whether the upload is still pending.
      2. Connect to Wi-Fi and let the upload finish.
      3. If you want to use mobile data instead, open Menu > Settings.
      4. Under Data usage, turn off Transfer files only over Wi-Fi, if that setting is available.
      5. Refresh the same account and folder in your browser after the upload finishes.

      The setting controls file transfers. Mobile transfers use your data allowance. If the file still does not appear, after 10 or so minutes, double check available Drive storage, the upload’s error message, and the selected account.

      Google’s Android upload instructions.

    3. AMP Installing to the wrong drive or directory fix

      AMP Installing to the wrong drive or directory fix

      AMP by Cube Coders is a fantastic game server management tool, automating and simplifying alot of otherwise headache inducing tasks related to managing such servers. However it does have some rough edges. In this case it will install files to the first empty drive it finds or otherwise seemingly a random drive, which is far from ideal, especially if you have USB devices connected.

      Here is the fix for windows 11(should work for any windows version) , working as of 28/04/2022:

      1. Close AMP and Kill any AMP proccesses in task manager
      2. Uninstall via windows
      3. Reinstall
      4. Run through the install wizard as normal and create an instance when prompted
      5. complete the instance wizard until AMP reboots.
      6. Close AMP and kill any proccesses with task manager
      7. Navigate to “InstanceManager.exe” inside the “AMP” folder, within the main install and launch it
      8. select “No”
      9. Right click on the only instance in the list and select “Uninstall Service” and then close the application.
      10. Find AMPDatastore folder and move it where desired
      11. Open REGEDIT and navigate to: Computer\HKEY_LOCAL_MACHINE\SOFTWARE\CubeCoders\AMP\InstanceManager
      12. Edit the “InstanceStore” entry to match the diesired folderpath.
      13. Inside the AMPDatastore folder find and open “instances.json” (i reccomend notepad++)
      14. Look for the line beginning with “”Path”:”.
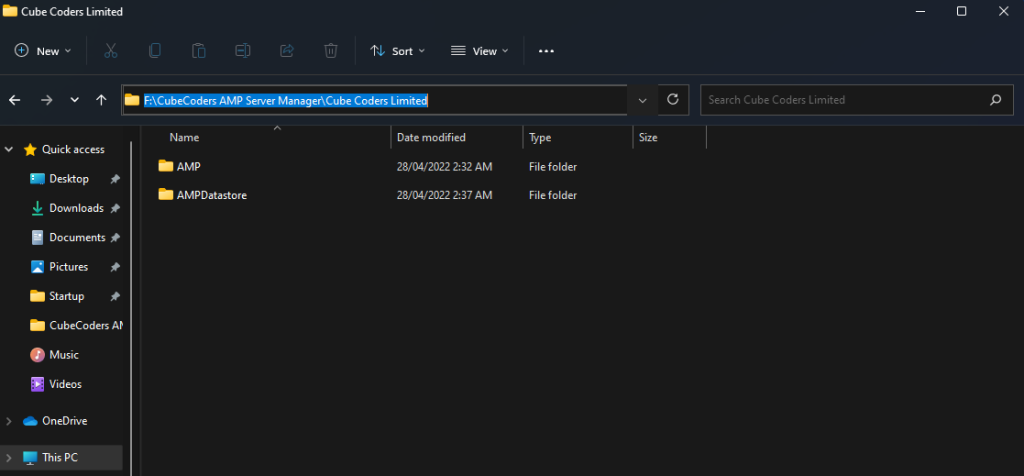
      15. Change the letter to the correct drive and add AMPDatatstore folders filepath to the beginning
        instead of: “Path”: “J:\AMPDatastore\Instances\AMPInstance1-ADS”,
        Make it: “Path”: “F:\CubeCoders AMP Server Manager\Cube Coders Limited\AMPDatastore\Instances\AMPInstance1-ADS”,
        for example
      16. Launch InstanceManager again and confirm everything is where it should be.
      17. from here on you can launch with the main shortcut or exe as normal.
    4. Tainted Grail: Side with Galahad or Keeper Captain

      Tainted Grail: Side with Galahad or Keeper Captain

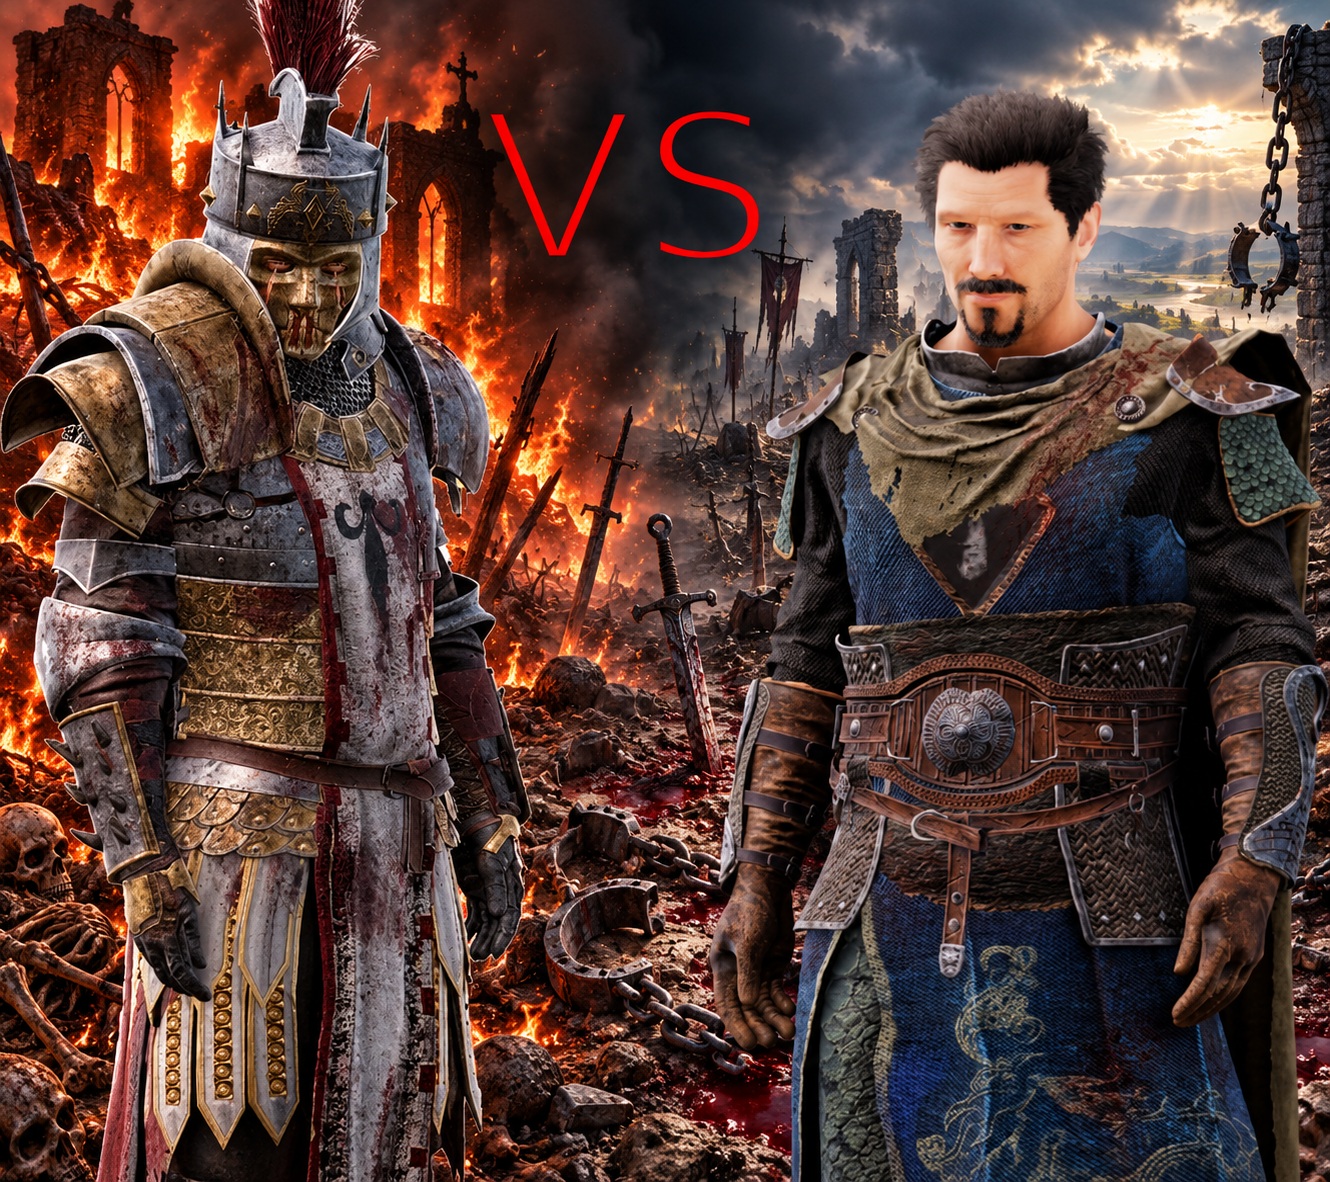
      I recommend siding with Galahad. You get access to more unique loot and only miss out on Galahads gear, which is fairly lame buffwise.

      Ill start with the mechanical differences like loot and merchant availability, with story spoilers towards the end.

      Mechanical differences

      Loot for siding with Galahad

      Siding with Galahad nets you the following notable loot. Make sure you loot the corpses of named characters and berserkers. These are the base bonuses listed on the wiki; upgrades can change some of them.

      These aren’t all exclusive to this route. You can get the Volker Berserker’s Totem from berserkers in other encounters too. This fight just gives you a good opportunity to collect several useful items.

      The temple fight

      I found the fight reasonably easy, though that will depend on your build and equipment. Berserkers defend the temple, but you have the help of Galahad’s soldiers. They can die quickly, so don’t rely on them to do all the work. You can also loot their bodies afterward to get pieces of the Knight set and some other valuable loot to sell.

      You can lure the berserkers down the stairs and fight them one or two at a time. This makes the fight much more manageable.

      Loot for siding with the Captain and One-Eye

      I prefer the bonuses on the equipment available through Galahad’s route. But if you want his mace or like the look of his armour, the Captain’s route gives you those instead. Don’t forget the game has a transmog system, so you can use the appearence on better armor.

      For an explanation of Burn buildup:
      https://taintedgrail.wiki.gg/wiki/Active_Effects

      Other useful equipment

      Knight’s Breastplate: Recover stamina 33% faster after overexerting yourself. It can also be crafted, so it isn’t exclusive to either route.
      https://taintedgrail.wiki.gg/wiki/Knight%27s_Set

      Great Beast’s Bone: +5% maximum HP. This comes from accepting Gro’derr’s gift during Altars of Madness, so don’t count it as a direct reward for siding with the Captain.
      https://taintedgrail.wiki.gg/wiki/Great_Beast%27s_Bone
      https://taintedgrail.wiki.gg/wiki/Jewelry

      Story differences: spoilers below

      If you only wanted the loot comparison, stop here. The rest covers what happens to the keep and why I prefer Galahad’s route.

      Siding with Galahad

      If you side with Galahad, Captain Breandán and One-Eye are killed. Fearghas, our favourite level-headed Quartermaster, becomes Interim Captain of the Horns of the South. Cillian, our not-so-favourite psychopathic Bounty Overseer, becomes the new Quartermaster.

      The appointments are recorded in Galahad’s Directive:
      https://taintedgrail.wiki.gg/wiki/Galahad%27s_Directive

      I consider this the better outcome. If you’ve done the quests around the keep, then you know Fearghas is a good leader. He’s kind and practical, while also being strict when needed. He takes responsibility for the keep’s problems and wants to keep his people alive and happy. I’d much rather have him in charge.

      Galahad is far more brutal and strict. I don’t agree with his methods, but I found his argument more convincing than Breandán’s. Leaving Fearghas in charge with Kamelot’s support seems like the better future for the keep. For me, it’s the lesser of two evils. Galahad and the Captain both revel in unecassary bloodshed and suffering, with the captain funding the bandit invasion you’ve spent most of the act dealing with and devastating the region and his so called Keeper Brothers.

      Siding with the Captain and One-Eye

      Breandán wants to establish the Horns of the South as independent of Kamelot, with the Keepers and Dál Riata working together. His reasons include protecting the region from Galahad and putting its people ahead of distant rulers. But who is gonna protect the region from him?

      Those are reasons to support him, but I still wasn’t convinced by his plan. I preferred Fearghas as a leader, and the promise of independence wasn’t enough to make me side with Breandán and One-Eye and rang hollow.

      Breandán’s journal entries cover his motivations:
      https://taintedgrail.wiki.gg/wiki/Breand%C3%A1n

      This route does give you a reason to choose it beyond the loot. After killing Galahad, you can hear the Captain’s secret and gain access to Sewal’s Crypt, where you learn more about Arthur and the original knights. Make sure you agree to hear him out when you report back. But IMO the implication secret reveals is something youve probably already figured out. Secret itself is interesting, but not worth sacrificing the region for.

      Don’t assume that reaching Excalibur through Galahad’s route gives you the same revelation. If seeing that part of the story matters to you, it’s a reason to support the Captain.

      Quest walkthrough:
      https://taintedgrail.wiki.gg/wiki/Shadow_Of_The_Horns
    5. Stupid Invaders Crashing or freezing on button press or click FIX

      Stupid Invaders Crashing or freezing on button press or click FIX

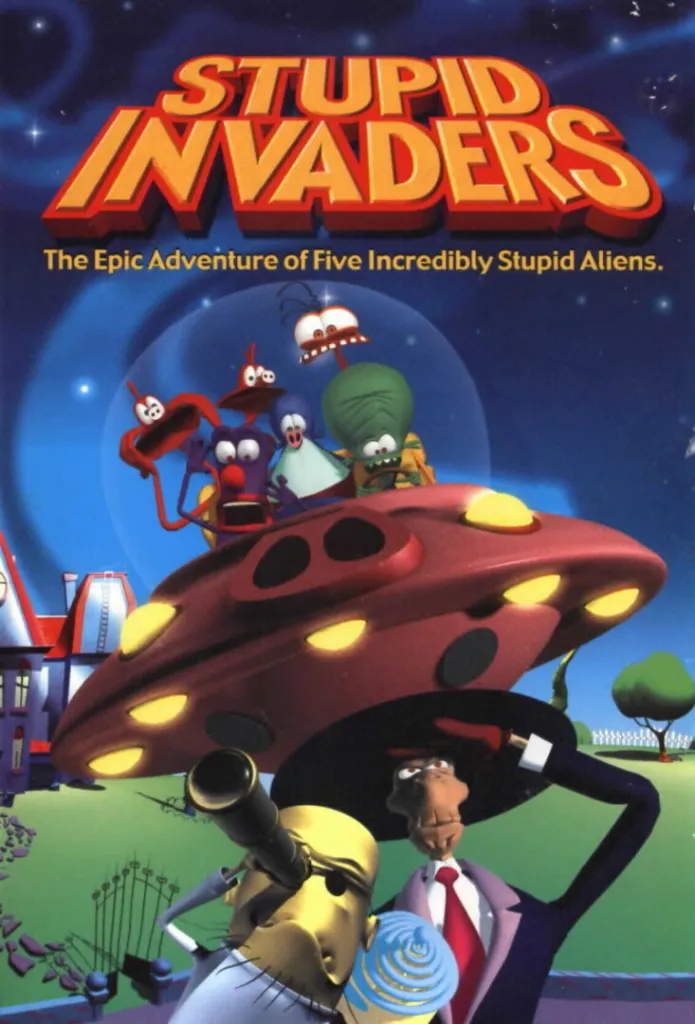
      This fix was successfully applied to the retail disc version of the game, on a windows 10 machine, on the 10/05/2022.

      First try running it in compatiblity mode:

      1. Right click on the shortcut or executable
      2. Select “Troubleshoot Compatibility”
      3. Select “Try recommended settings”. This will probably apply a windows XP service pack compatibility.
      4. Click “Test the program…”
      5. If that fails, close the troubleshooter window and try the next fix.

      The Stupid Invaders 2000/XP Patch

      1. Go here: https://archive.org/details/StupidInvaders2000xpPatch
      2. On the right hand side under download options, click on “WINDOWS EXECUTABLE”
      3. Open and run the downlaoded executable.
      4. Select “PATCH!”
      5. Wait for the confirmation message, then close the patch window
      6. Launch the game

      Hopefully your game is now working fine. These are the steps i used to get it working for a client, but if they don’t work for you heres some other stuff you can try: https://www.pcgamingwiki.com/wiki/Stupid_Invaders

    6. Cut an image into a shape with photoshop

      Cut an image into a shape with photoshop

      The video may contain some outdated techniques, but the method still works. The text tutorial is updated.

      1. Open your image in Photoshop. This creates the document you’ll work in, with your image as its starting layer.
      2. Add a solid-filled shape on a separate layer above the image. The shape defines the outline of your cutout. Make sure its interior is filled, rather than using only an outline.
      3. Position and resize the shape over the area you want to keep. Select the shape layer, then press Ctrl+T on Windows or Command+T on Mac to enter Free Transform. Drag inside the transformation box to move the shape, and drag its corner handles to resize it. When you’re happy with its position and size, press Enter on Windows or Return on Mac, or click the check mark in the options bar at the top. This applies your changes and exits Free Transform.
      4. Turn the shape into a selection. Hold Ctrl on Windows or Command on Mac and click the shape layer’s thumbnail in the Layers panel—the small preview picture beside its name. This selects the shape’s nontransparent area, marking the part of your image you’ll keep.
      5. Hide the shape layer. Click the eye icon beside it in the Layers panel. This removes the visible shape from the canvas while leaving your selection active, so the shape won’t cover the finished image.
      6. Apply the selection as a mask to the image. Select the image layer, then choose Layer → Layer Mask → Reveal Selection. This keeps the image visible inside the shape and hides everything outside it. The hidden pixels remain available if you want to adjust the mask later.
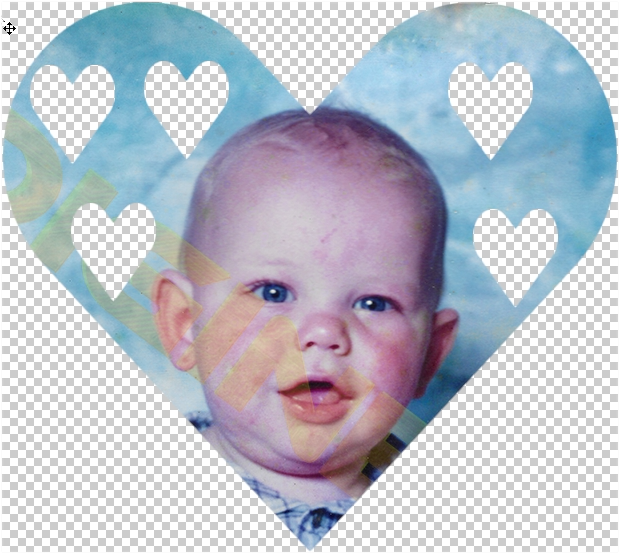
      7. Hide any unwanted background layers. Click their eye icons so only your cutout remains visible. The checkerboard around it indicates transparency; it won’t appear in the exported image.
      8. Crop away excess canvas if needed. Select the Crop Tool and adjust the crop boundary around your cutout. To preserve cropped image content for later edits, leave Delete Cropped Pixels unchecked in the options bar. Press Enter on Windows or Return on Mac, or click the check mark to confirm. This reduces empty space around the image.
      9. Save your Photoshop project as a PSD (optional). Choose File → Save As and select Photoshop (.PSD). This preserves your layers and mask so you can reopen the project and edit it later. Saving a PSD is technically optional—you can skip it if you only need the finished image.
      10. Export a usable image. Choose File → Export → Export As, select PNG, and enable Transparency before exporting. This creates an image you can upload, share, or use in other projects while keeping the area outside your cutout transparent. JPEG doesn’t support transparency.