Category: Tech Support

  • Share Your USI VET Transcript

    Your USI VET transcript shows nationally recognised vocational education and training (VET) reported since 2015. It is an Australian Government service that can help you prove your qualifications to employers or education providers.

    Note: It does not replace certificates or statements of attainment issued by your training provider entirley. Some orgnizations with stricter requirments may want to verify with the actual certificates instead.

    Download or share it

    1. Sign in through the USI Student Portal.
    2. Open View VET Transcript, read the disclaimer and select Next.
    3. Select the training records to include. Choose all records for a full transcript or specific records for an extract.
    4. Select Download Transcript.
    5. When asked whether to create a viewable online VET transcript, select Yes if you want to share an authenticated online version. Choose an access period between one week and six months, then follow the prompts to confirm.
    6. Download and save the PDF. If you created the online version, use the link or QR code in the document to let the intended recipient access the authenticated transcript.

    Important notes:

    • If you choose not to create a viewable online transcript, the PDF will not include the authenticated link or QR code.
    • Online access expires after the period you select, and you can cancel access earlier.
    • The transcript may not include every qualification, particularly if training has not yet been reported or was completed before 2015. Check the record carefully and contact your training provider about missing information.
    • Your transcript contains personal information, so share it only with the intended recipient.

    Read USI’s transcript-sharing guide for the official instructions.
  • Find Specific Text in a Page or Document with Ctrl+F

    Find Specific Text in a Page or Document with Ctrl+F

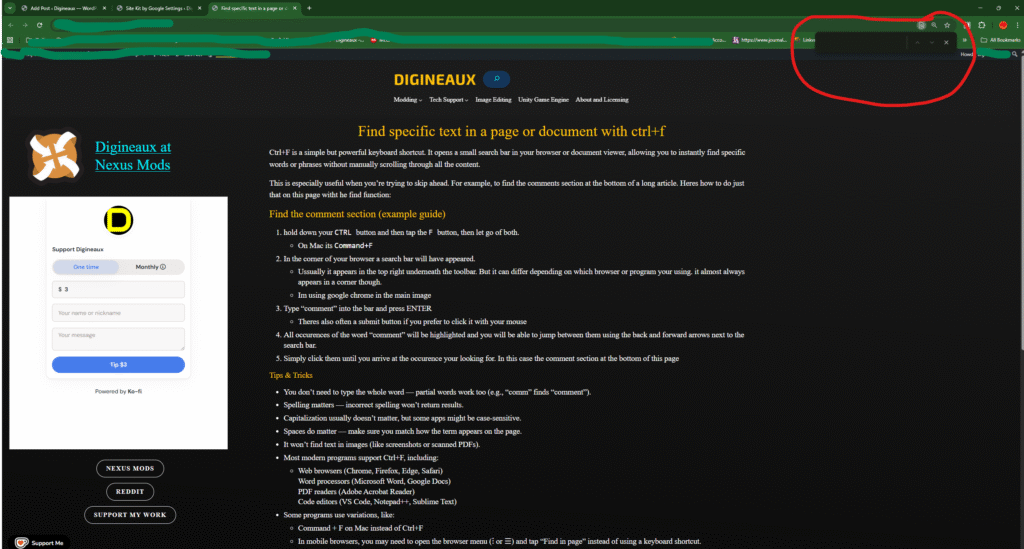
    Ctrl+F opens Find in many browsers and document apps. Use it to look for a word or phrase in the page or document you already have open, without scrolling through everything.

    It is handy for finding a download section, a setting in a long guide, or the comments below an article. On a Mac, the usual shortcut is Command+F.

    Find the comments section: an example

    1. Open the page you want to search. Hold Ctrl, tap F, then release both keys.
    2. A Find box appears. Its position depends on the browser or app.
    3. Type comment. Matching text is highlighted.
    4. Use the arrows beside the Find box to move through the matches until you reach the comments section. In many desktop browsers, Enter goes to the next match and Shift+Enter goes back.
    5. Close the Find box when you are finished. Desktop browsers usually let you press Esc. You can also simply click on an empty part of the page to unfocus and deselect the Find Box.

    Tips when you cannot find something

    • Try a shorter search. comm can find comment or comments. Check for spelling mistakes and extra spaces.
    • Some apps have search options such as Match case or Whole words. Check whether these are excluding the result you want.
    • Comments, collapsed sections, or more results may need to be opened before their text can be found.
    • Text in a screenshot or scanned PDF needs text recognition, often called OCR, before ordinary Find can search it. A PDF that already has a recognised text layer can be searched.
    • On a phone, look in the browser menu for Find in page or Find on page.

    Ctrl+F searches the current page or document. To find an article elsewhere on a website, use that website’s search instead.

    For the browser instructions, see Google’s Find in page guide. Adobe also explains how text recognition makes scanned PDFs searchable.

  • Get a List of Files in a Windows Folder

    You can get a plain-text list of files in a Windows folder using Command Prompt or PowerShell. Use it to check your installed mods, keep a file inventory, or send a list to someone helping you troubleshoot.

    Replace C:\path\to\your\folder in the examples with your folder’s actual path. Keep the quotation marks, especially if the path contains spaces. These commands list files; they do not open or change them.

    Option 1: Command Prompt

    Press Windows + R, type cmd, and press Enter. Then run:

    dir /b /a:-d "C:\path\to\your\folder"

    This prints file names without the usual dates and sizes. It excludes folders and includes hidden and system files. It only lists the folder you specified. To include its subfolders and show full paths, add /s:

    dir /b /s /a:-d "C:\path\to\your\folder"

    If you prefer to change folders first, use cd /d "C:\path\to\your\folder", then run dir /b /a:-d. The /d lets Command Prompt change drives as well as folders.

    Option 2: PowerShell

    Press Windows + R, type powershell, and press Enter. For file names only, run:

    Get-ChildItem -LiteralPath "C:\path\to\your\folder" -File | Select-Object -ExpandProperty Name

    -LiteralPath treats characters such as square brackets as part of the path. -File excludes folders. PowerShell leaves out hidden and system files by default; add -Force if you want them included.

    To include subfolders and show each file’s full path, use:

    Get-ChildItem -LiteralPath "C:\path\to\your\folder" -File -Recurse | Select-Object -ExpandProperty FullName

    Adding -Force includes hidden files, but does not grant access to folders your account cannot read.

    Save the list to a text file

    PowerShell can save a UTF-8 list to your Desktop. Save it outside the folder you are listing so the output file is not included in its own inventory:

    $output = Join-Path ([Environment]::GetFolderPath('Desktop')) 'filelist.txt'
    Get-ChildItem -LiteralPath "C:\path\to\your\folder" -File | Select-Object -ExpandProperty Name | Out-File -LiteralPath $output -Encoding utf8 -NoClobber

    -NoClobber prevents overwriting an existing filelist.txt. If that name is already taken, change it to something like filelist-2.txt. Open the saved file in Notepad to copy or share the list.

    File names and full paths can contain personal information, including your Windows username. Read through the list before sharing it.

    Command references

    Microsoft documents the options used here: dir, cd, Get-ChildItem, and Out-File.

    Bonus: If you want a recursive search, which includes subdirectories, then add the -Recurse command like this:

    Get-ChildItem -LiteralPath "C:\path\to\your\folder" -File -Recurse |
    Select-Object -ExpandProperty FullName |
    Out-File -LiteralPath $output -Encoding utf8 -NoClobber
  • Take Screenshots with the Windows Snipping Tool

    Take Screenshots with the Windows Snipping Tool

    Use a screenshot to save an error message, show a setting, or capture part of a page. On Windows, Snipping Tool can capture a rectangle, window, full screen, or freehand region.

    Capture a region

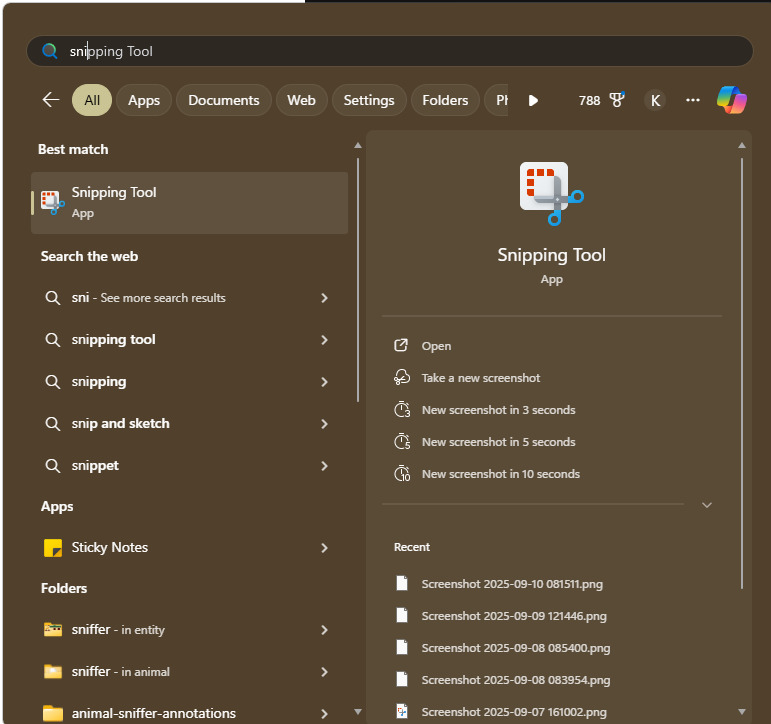
    1. Press Windows + Shift + S together. You can also find Snipping Tool from the Start menu and choose New.
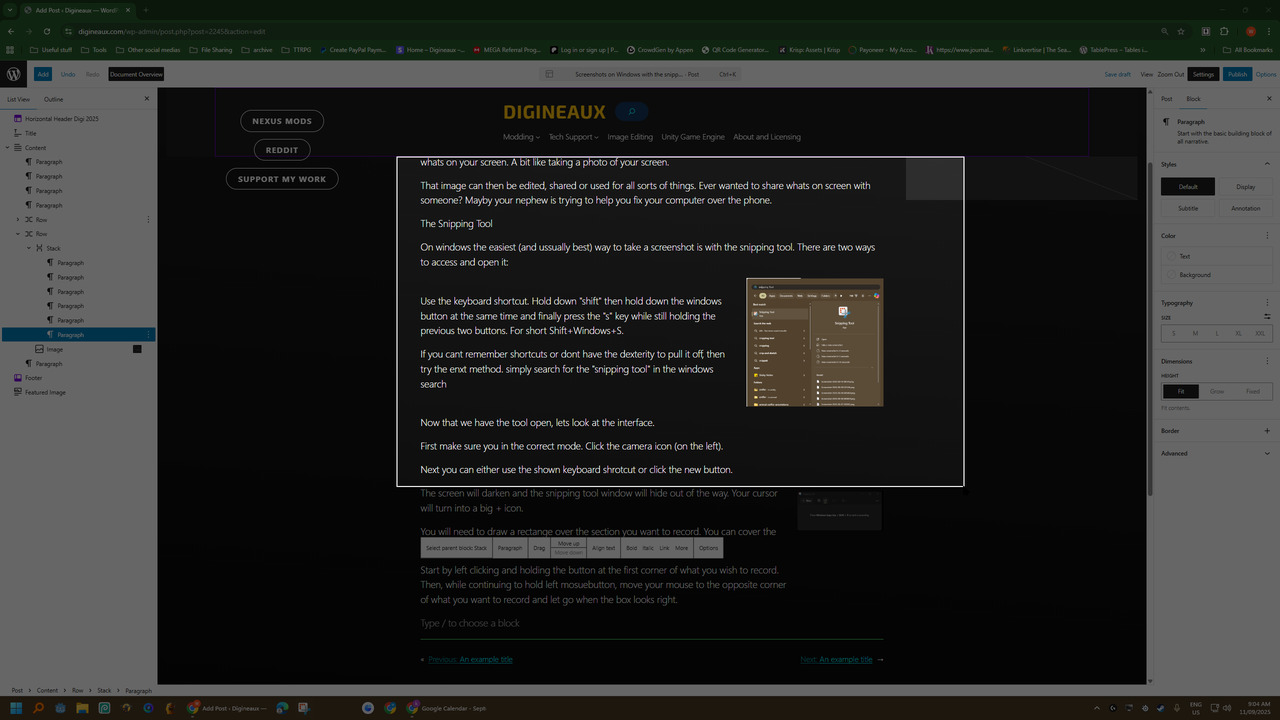
    2. Choose the capture mode. For a rectangle, click and drag around the area you want.
    3. Release the mouse button to capture it.
    4. Open the notification or return to Snipping Tool to review, crop, annotate, or save the image.

    The capture is available on the clipboard for pasting. Recent versions can save screenshots automatically; check Snipping Tool’s Settings for the auto-save option and destination. You can always save a copy yourself.

    Microsoft’s Snipping Tool guide.

    Screenshots on Windows with the Snipping Tool — screenshot 1
    Screenshots on Windows with the Snipping Tool — screenshot 2
    Screenshots on Windows with the Snipping Tool — screenshot 3
  • Fix “File Name Too Long” in Windows OS

    Fix “File Name Too Long” in Windows OS

    1. press windows key + R
    2. Type “regedit”
    3. Press the enter key
    4. Optional: backup registry. Tto skip go to step 13
    5. Click “File” in the top left
    6. Click “Export” in the context menu
    7. Choose a directory and filename your likely to remember
    8. Click save
    9. Optional: Restore Registry – to skip go to step 13
    10. Click “File” in the top left
    11. Click “Import”
    12. Navigate to and select the .reg export file we mad earlier.
    13. The left hand pane works the same as windows file explorer.
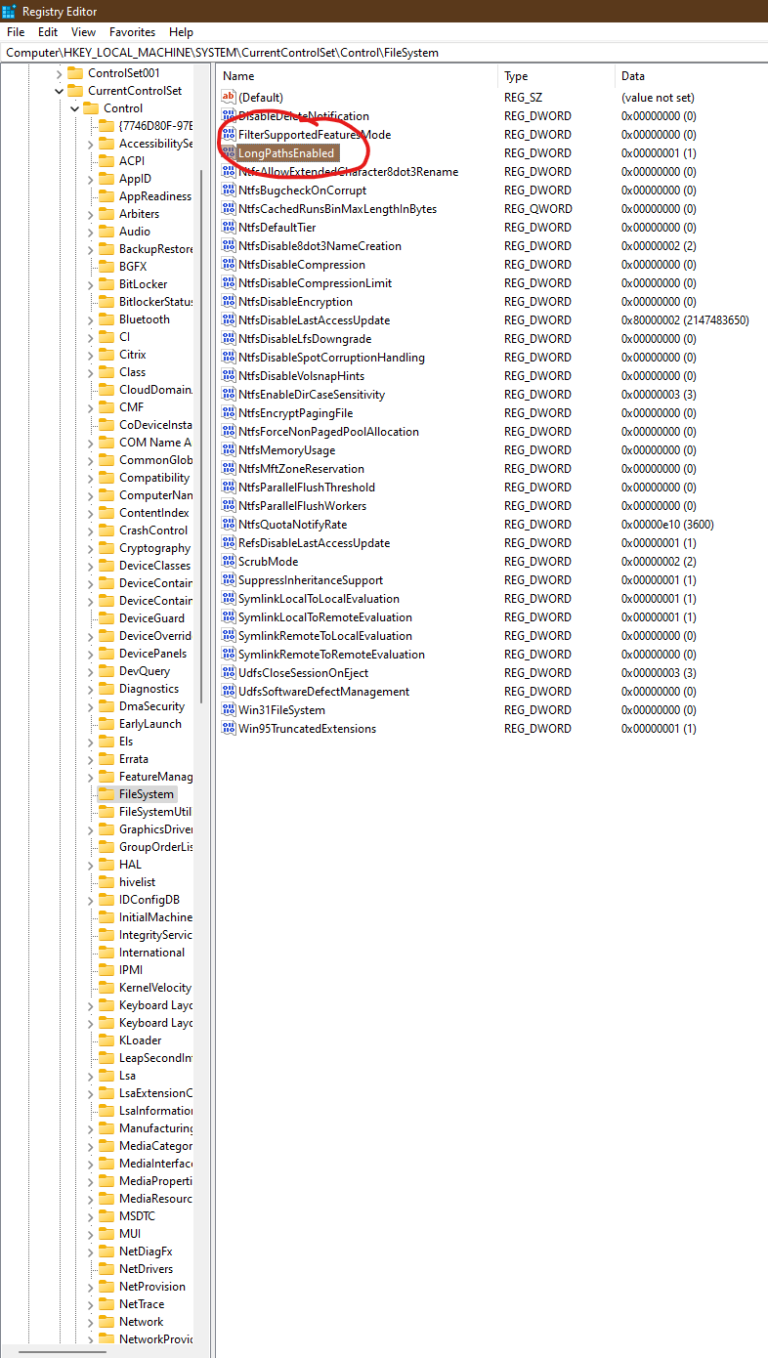
    14. Navigate to: “HKEY_LOCAL_MACHINE\SYSTEM\CurrentControlSet\Control\FileSystem” in the left pane.
    15. On the right hand pane look for “LongPathsEnabled”
    16. If you found it skip to step 19, otherwise continue to next step.
    17. on the right hand pane right click on the empty white space and click “New”, then select “DWORD (32-bit) Value”.
    18. Input “LongPathsEnabled” as the name.
    19. Double click on the “LongPathsEnabled” entry to edit it.
    20. Set the “Value data” value to “1”.
    21. Click “ok”
    22. close the registry editor and restart your PC.
  • Headsets: Fix Uneven or Missing Audio

    Headsets: Fix Uneven or Missing Audio

    This is very common in Logitech models like the Logitech G733. But it occurs in other brands and models soemtimes too. You’ve tried everything you can think of; driver updates, resetting the software, changing the mixers in steelseries sonar, turning them off and on etc.. But the solution is fairly well hidden despite being so simple. It certainly took me an embarrisingly long time to figure out.

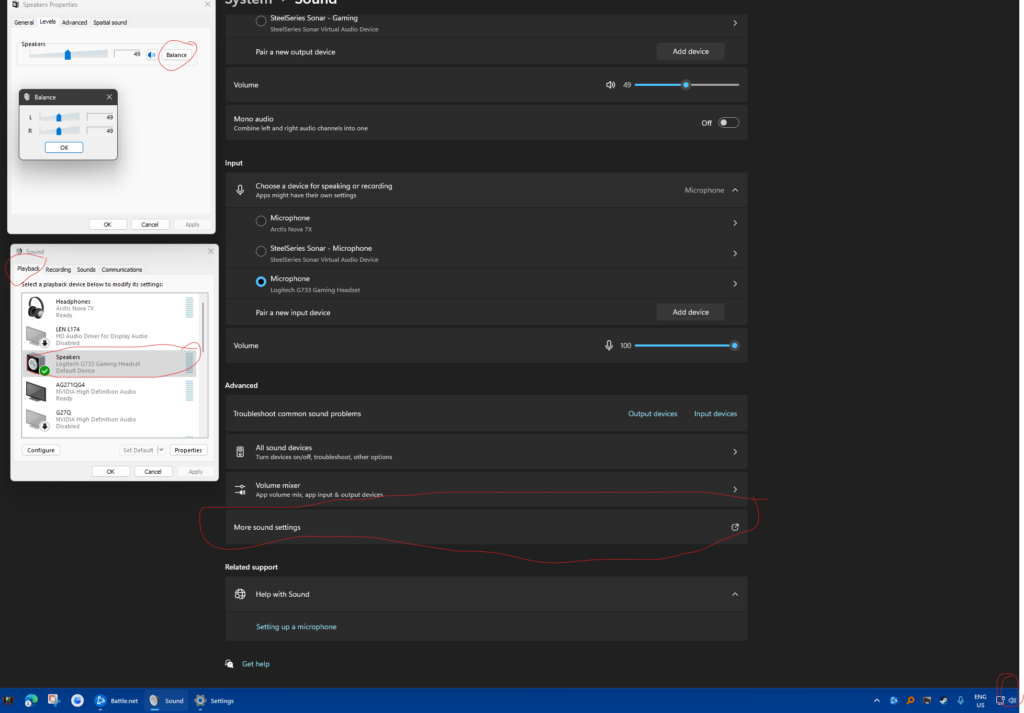
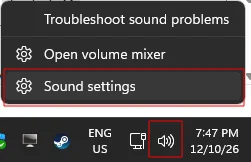
    Right click the Windows taskbar volume icon and open Sound settings.

    In sound settings you will see an “Advanced” section towards the bottom (you may need to scroll down). Click the “More sound settings” button inside that section.
    If you don’t care about surround sound, you can also try toggling on the “Mono audio” setting, which combines the left and right chanels into one and plays it to both ears.

    In the new window that pops up, be sure your on the “playback” tab. Then search for your headset, right click on it and select “properties” from the context menu. Yet another window will pop up.

    In this new window click on the “Levels” tab. It will display a screen with a volume bar. At the end of the bar should be a button called “Balance”. Click it for yet another window pop up (nobody ever accused Windows 11 of having a good UX).

    In this final window we finally have a left and right audio chanel balance settings. First try setting them both to the same value and hopefully everything sounds good. If not or if they were already set to the same values, then as a work around you will need to fiddle with the balance until you get it sounding right. Unfortunately it’s just trial and error.

  • Record Video with the Windows Snipping Tool

    Record Video with the Windows Snipping Tool

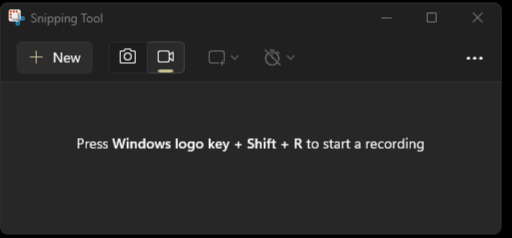
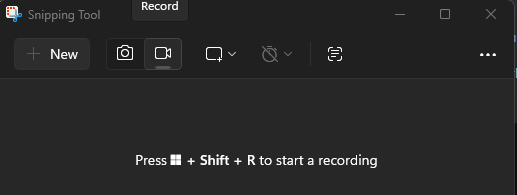
    Hold Windows key and Shift, then press R to open the snipping tool in video mode. You can also open the Snipping Tool from the windows menu or a shortcut to the executable and then click the video button

    With the tool open and in video mode you can click “New” or use the displayed keyboard shortcut to begin the screen selection mode.

      Now you can select the area of the screen to record by clicking and holding the left mouse button at the first corner and dragging the mouse with the button still held, to where you want the 2nd corner. This estabilishes the rectangular area to be recorded.

      This toolbar will appear, ussually at the top of your screen.

      Clicking the start button will begin a short few second count down, after which the recording will begin. so be sure your ready before clicking it.

      To the right of that button is the duration in hours:minutes:seconds. This tells you how long you have been recording (once youve started).

      The microphone button (to the right of the duration numbers) lets you select which microphone to record. By default it’s ussually set to “mute” which will prevent it recording any microphone.

      The next button to the right, toggles the recording of audio from your computer. That is any sound your computer nromally plays through the speakers or headphones, like game noises or video audio etc…

      Once the recording has begun, you can click the red stop button to stop and save the recording. At which point you will be presented with a new page:

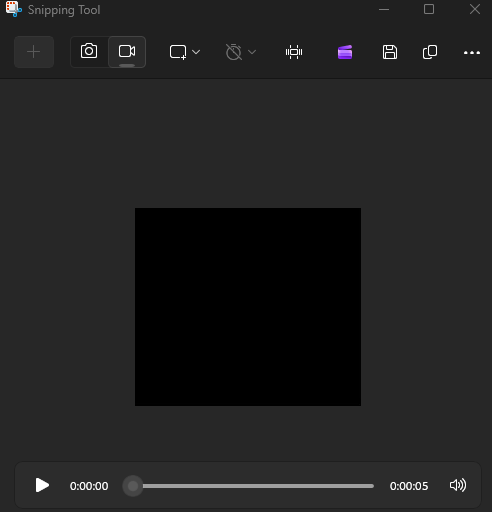
      Here you can play the video back. Use the trim button to cut bits out. Save it. Convert it to a .Gif or open it in clipchamp for more advanced editing.

      Tips:

      Before going to screen selection mode, you can click the window select mode button in the follong image to select an entire window, instead of sleecting an arbitrary rectangle.

      Before you publish any video, be sure it does not contain any private information!

      Microsoft’s Snipping Tool recording instructions.

    1. ASUS ROG Flow Z: SSD Missing from Windows Setup

      ASUS ROG Flow Z: SSD Missing from Windows Setup

      If your Intel based ASUS ROG Flow Z does not detect its internal SSD during Windows installation, try the following methods.

      Load the storage driver

      1. Find the support page for your exact ASUS model.
      2. Download the Intel Rapid Storage Technology (IRST/RST) driver, if your model requires it, and extract the files to a USB drive.
      3. At the Windows Setup drive selection screen, select “Load Driver” and browse to the extracted driver files in the USB from the previous step.
      4. Select the matching Intel RST VMD Controller driver and continue. The SSD should appear if the missing driver was the cause.

      Alternative: Disable VMD

      For a clean installation, you may be able to disable VMD instead.

      1. Save and exit, then restart Windows Setup.
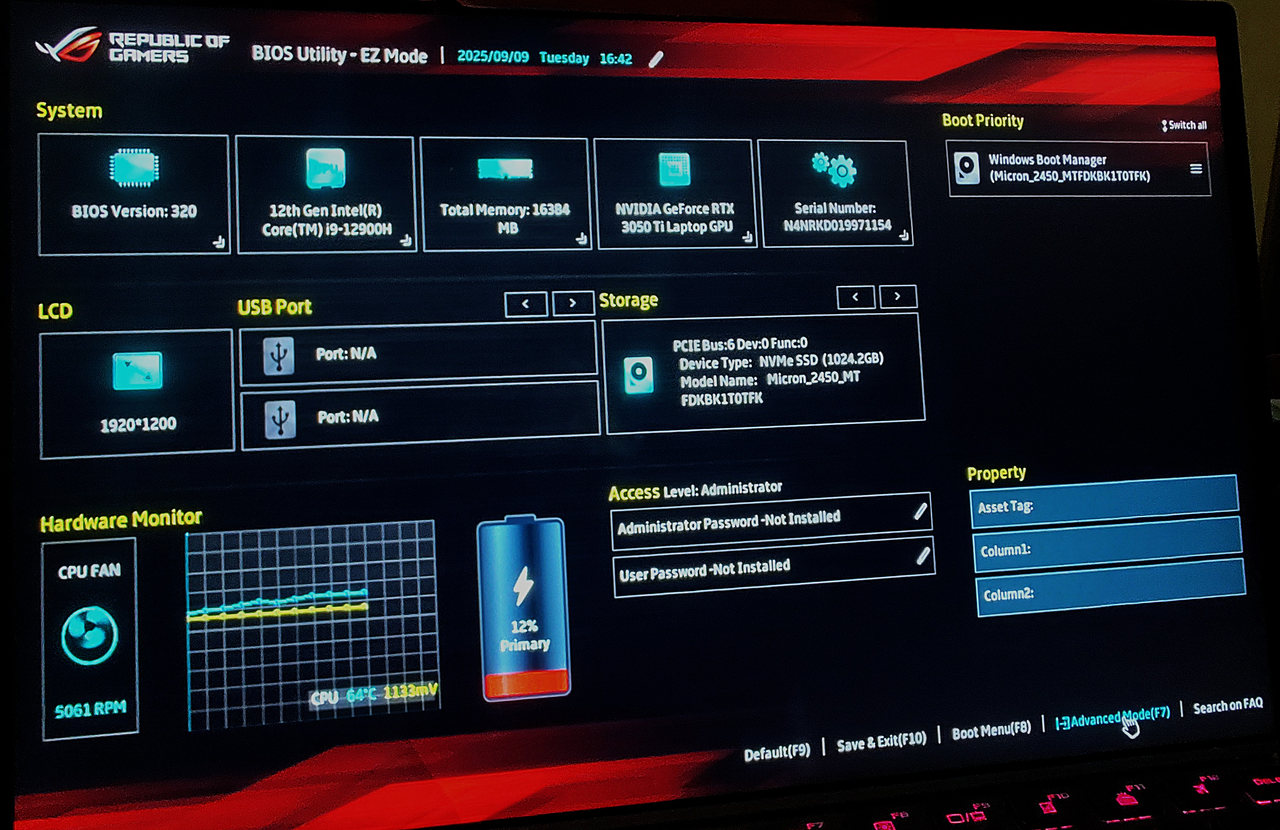
      2. Enter UEFI by holding F2 while powering on the device.
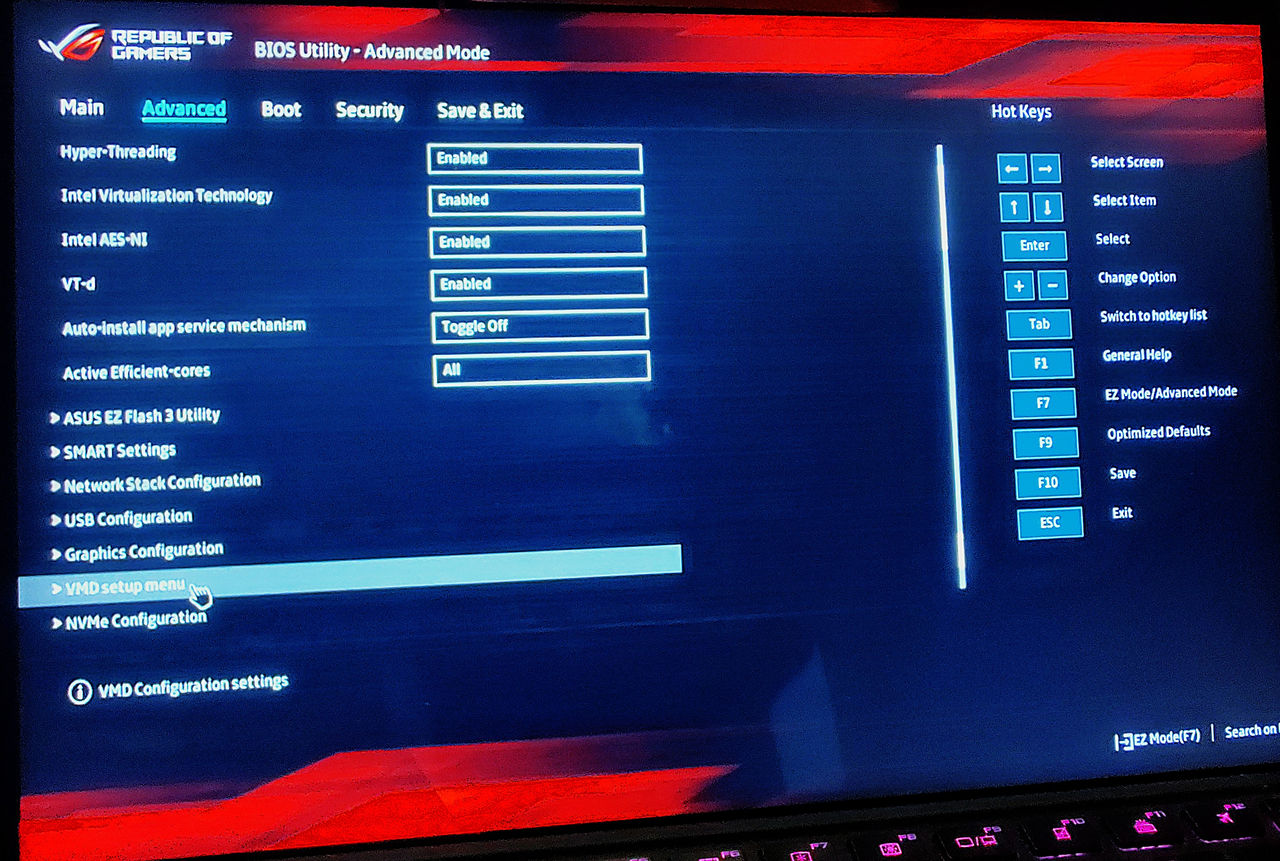
      3. Press F7 to open Advanced Mode.
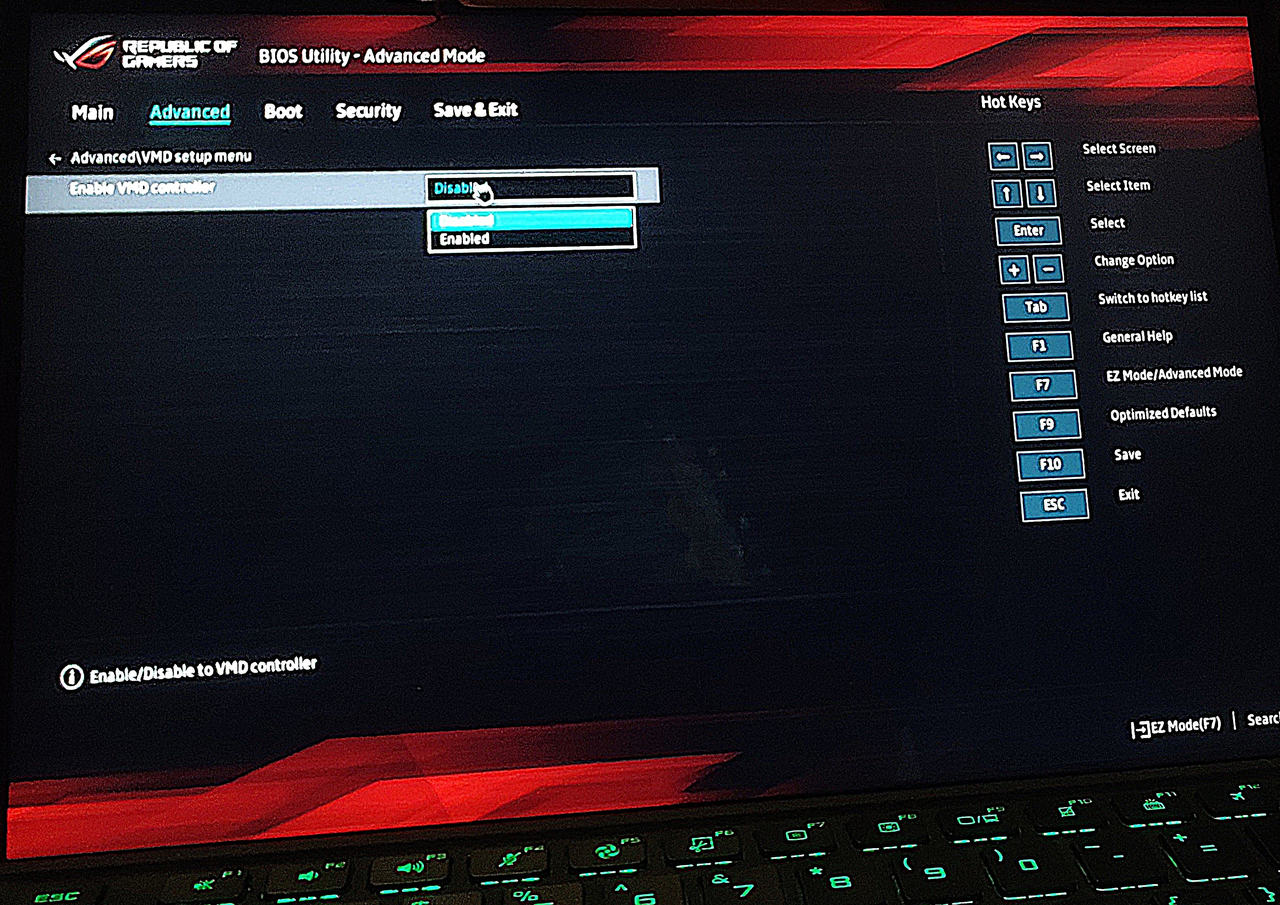
      4. Look for Advanced > VMD Setup Menu and disable the VMD controller.

      ASUS’s missing-drive troubleshooting guide covers both methods.

      ASUS ROG Flow Z Windows Setup storage troubleshooting — screenshot 1
      ASUS ROG Flow Z Windows Setup storage troubleshooting — screenshot 2
      ASUS ROG Flow Z Windows Setup storage troubleshooting — screenshot 3
    2. Android Photos Missing from Google Drive in Your Browser

      First check that you uploaded the photos to Google Drive, and that the Android app and browser use the same Google account.

      Check for a waiting upload

      1. Open Google Drive on your phone and check whether the upload is still pending.
      2. Connect to Wi-Fi and let the upload finish.
      3. If you want to use mobile data instead, open Menu > Settings.
      4. Under Data usage, turn off Transfer files only over Wi-Fi, if that setting is available.
      5. Refresh the same account and folder in your browser after the upload finishes.

      The setting controls file transfers. Mobile transfers use your data allowance. If the file still does not appear, after 10 or so minutes, double check available Drive storage, the upload’s error message, and the selected account.

      Google’s Android upload instructions.

    3. AMP Installing to the wrong drive or directory fix

      AMP Installing to the wrong drive or directory fix

      AMP by Cube Coders is a fantastic game server management tool, automating and simplifying alot of otherwise headache inducing tasks related to managing such servers. However it does have some rough edges. In this case it will install files to the first empty drive it finds or otherwise seemingly a random drive, which is far from ideal, especially if you have USB devices connected.

      Here is the fix for windows 11(should work for any windows version) , working as of 28/04/2022:

      1. Close AMP and Kill any AMP proccesses in task manager
      2. Uninstall via windows
      3. Reinstall
      4. Run through the install wizard as normal and create an instance when prompted
      5. complete the instance wizard until AMP reboots.
      6. Close AMP and kill any proccesses with task manager
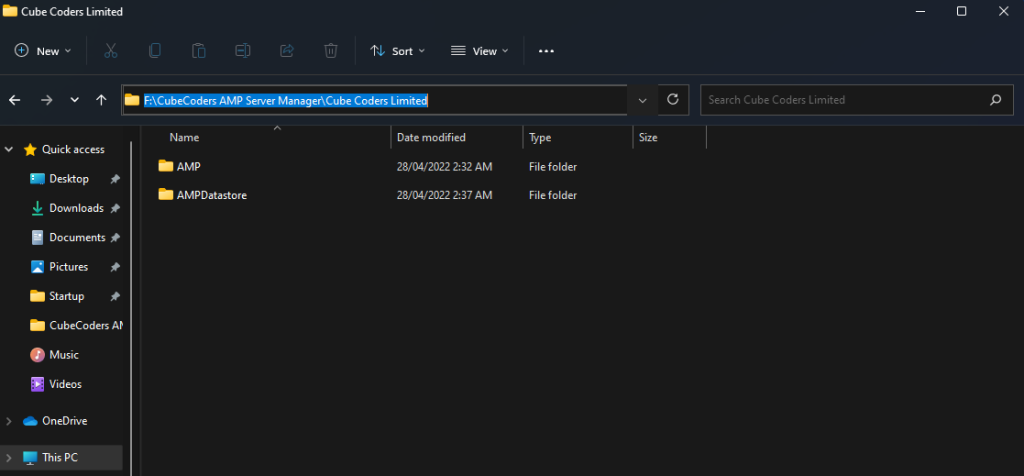
      7. Navigate to “InstanceManager.exe” inside the “AMP” folder, within the main install and launch it
      8. select “No”
      9. Right click on the only instance in the list and select “Uninstall Service” and then close the application.
      10. Find AMPDatastore folder and move it where desired
      11. Open REGEDIT and navigate to: Computer\HKEY_LOCAL_MACHINE\SOFTWARE\CubeCoders\AMP\InstanceManager
      12. Edit the “InstanceStore” entry to match the diesired folderpath.
      13. Inside the AMPDatastore folder find and open “instances.json” (i reccomend notepad++)
      14. Look for the line beginning with “”Path”:”.
      15. Change the letter to the correct drive and add AMPDatatstore folders filepath to the beginning
        instead of: “Path”: “J:\AMPDatastore\Instances\AMPInstance1-ADS”,
        Make it: “Path”: “F:\CubeCoders AMP Server Manager\Cube Coders Limited\AMPDatastore\Instances\AMPInstance1-ADS”,
        for example
      16. Launch InstanceManager again and confirm everything is where it should be.
      17. from here on you can launch with the main shortcut or exe as normal.